Form library · Construction and handover

Flooring inspection checklist

For installers, fit-out managers and inspectors checking a new floor before handover. Record the system, the substrate moisture and flatness against the limits in the specification, the installation checks and each defect with its length measured from a photo. Try the form below, see every question or open a completed example.

Ready to use from the form library, and every question is yours to edit. Try it for a small trial fee, cancel any time.

Try it on your phone

Try it on this phone

Fill in the flooring installation inspection on your phone now

See how the flooring installation inspection looks on your phone

Scan the code with your phone camera. It opens the real form, no sign-up needed.

Open the live example and fill it in, just as your team would on site. No sign-up needed.

See it on this phone

Every question is editable. Add this form to your account, then change the wording, add or remove questions and options, and make it fit your own jobs.

Or start your trial with this form ready →

One email, and we won't add you to a mailing list.

What should acceptance be based on?

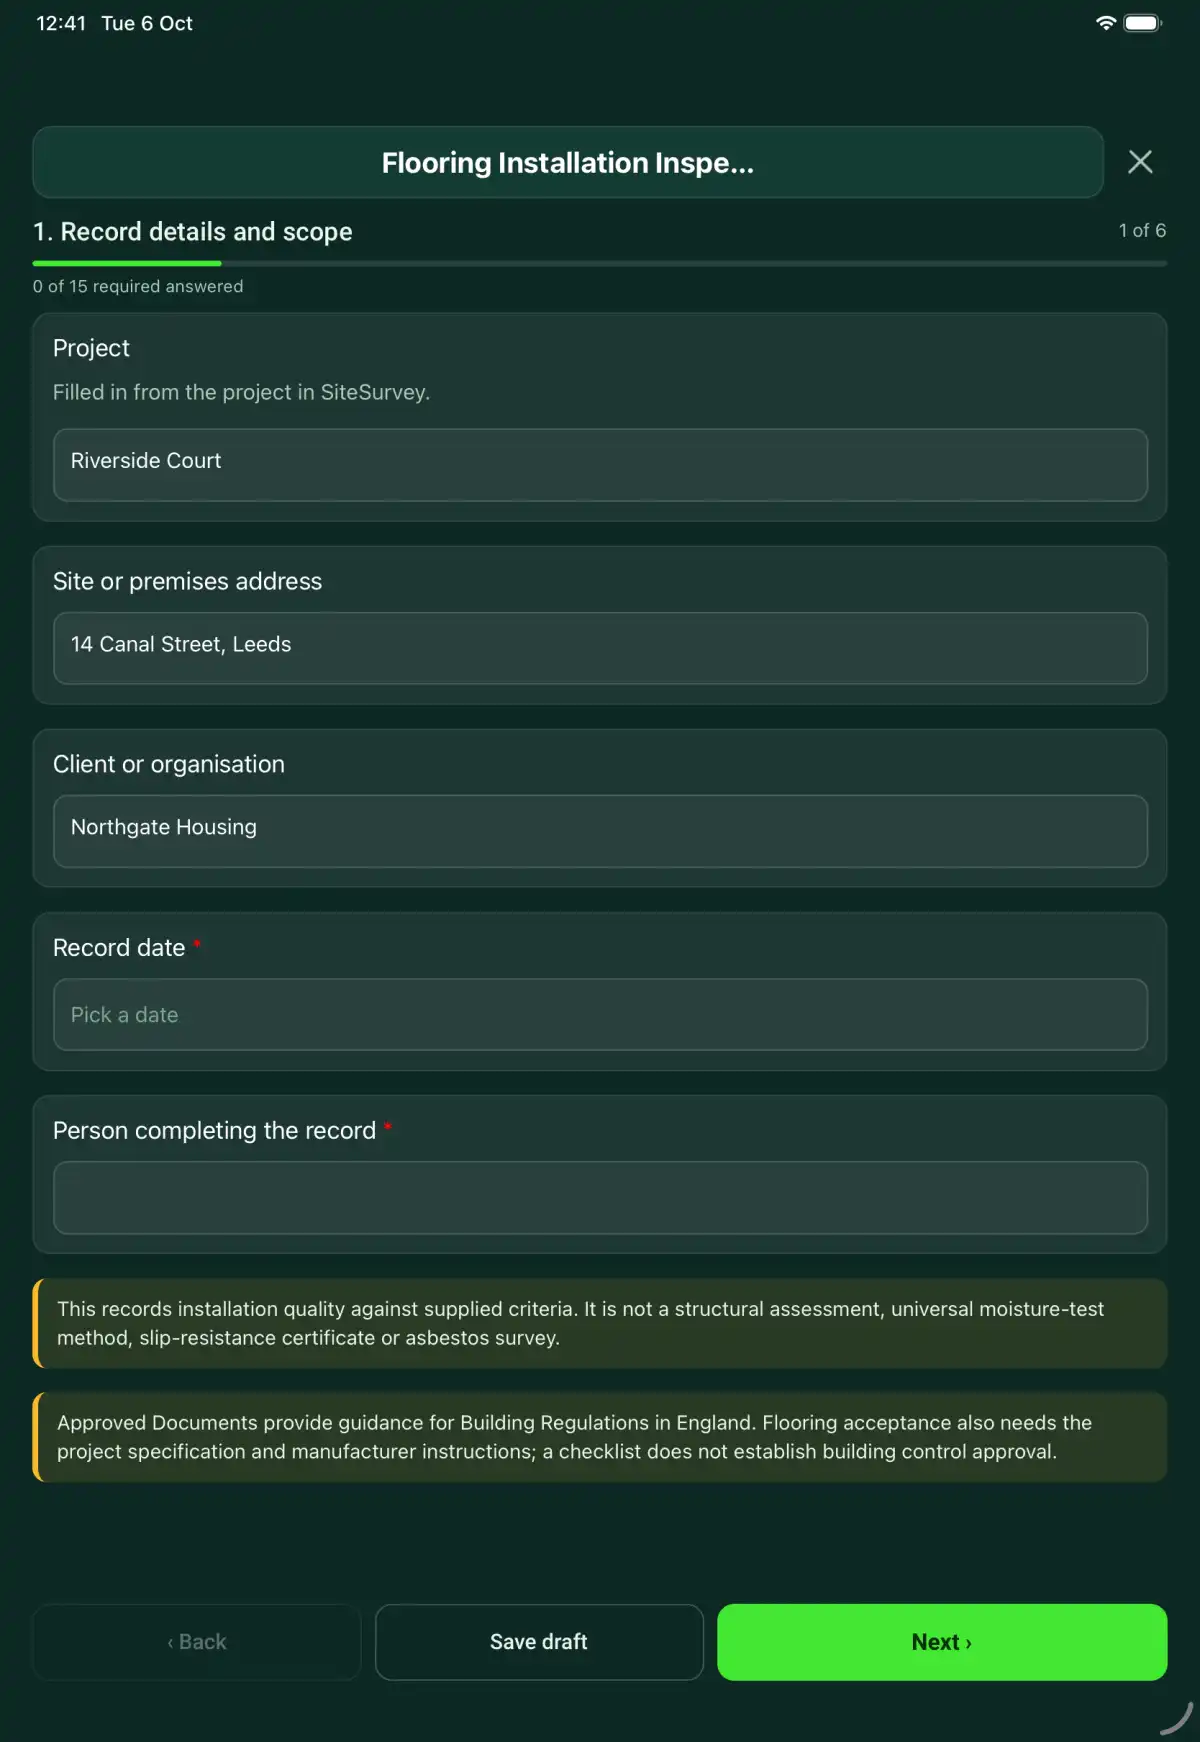
Approved Documents provide guidance for Building Regulations in England. Flooring acceptance also needs the project specification and manufacturer instructions; a checklist does not establish building control approval.

Last updated . Facts checked by the SiteSurvey team on 6 October 2026 against GOV.UK Approved Documents for England and HSE managing risks and risk assessment.

Built for checking a new floor before handover

Check the floor on a phone before you hand it over. Record the substrate moisture and flatness against the limits in the specification, measure each defect from a photo, and let the form count the checks needing action and the repairs due before handover.

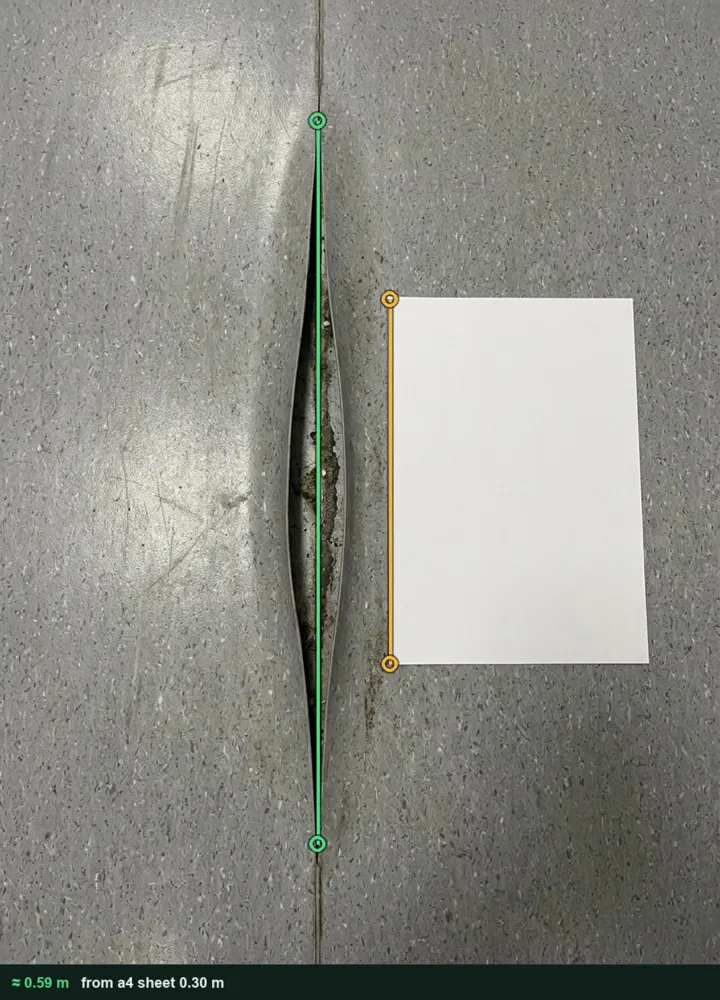
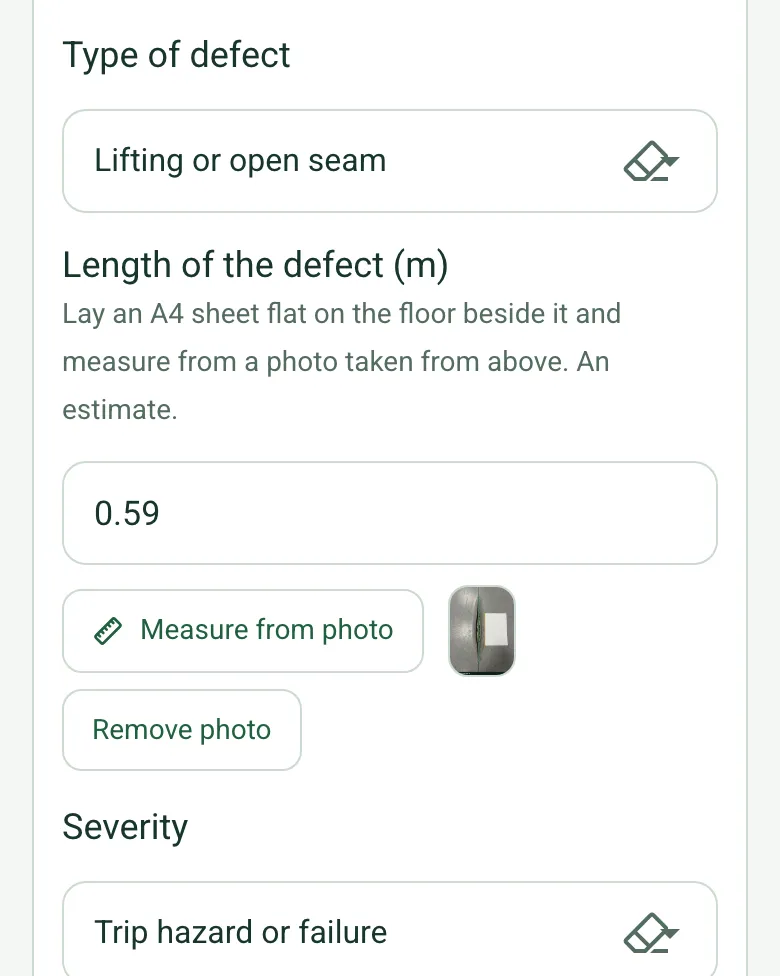
Defect 1 in the corridor, Lifting or open seam, with Length of the defect 0.59 m and its measuring photo, and severity Trip hazard or failure

Defects measured from a photo

Lay an A4 sheet on the floor beside the defect and photograph it from above. The form adds up the length of defects for the repair. It works on web forms in any phone browser today, and the app version is on its way.

How measuring from a photo works →
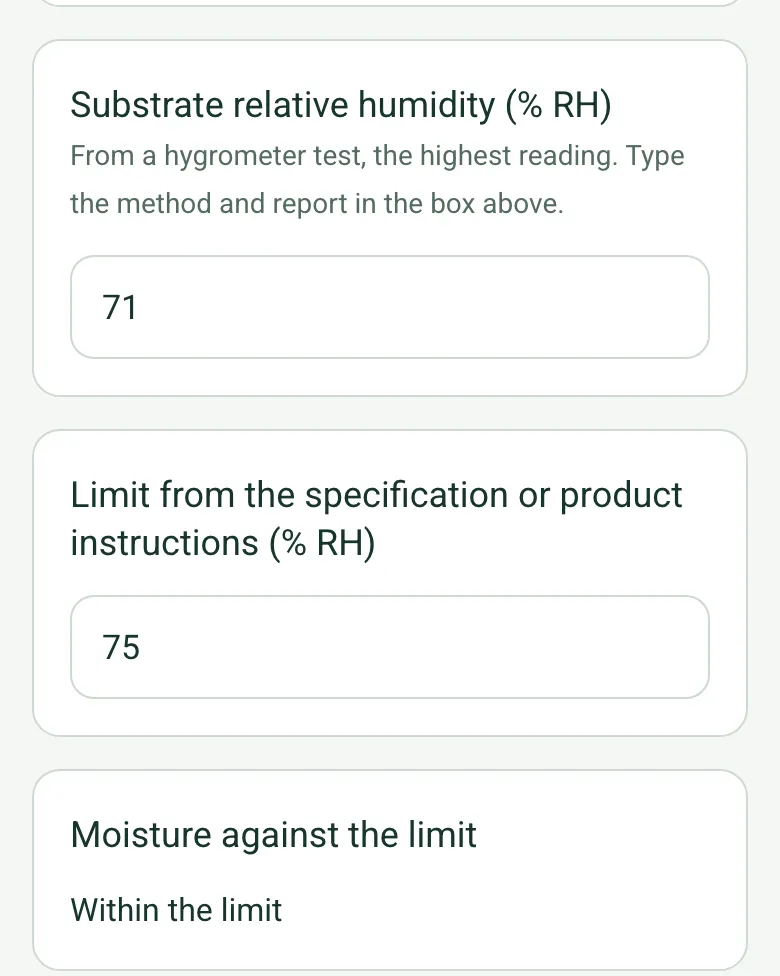
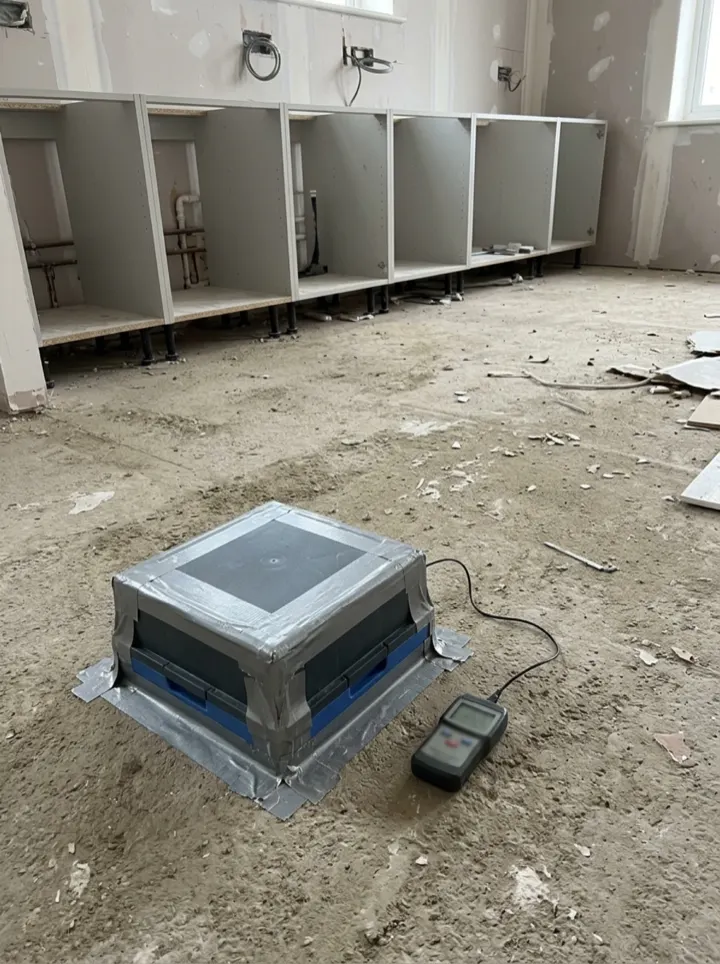
Substrate relative humidity 71% RH against a limit of 75% RH, worked out as Within the limit, above the flatness check

Moisture against the limit

Enter the hygrometer reading and the limit from the specification or the product instructions, and the form says whether it is within it. Flatness under a 2 m straightedge works the same way. The limits are yours; the form does not set them.

How calculated fields work →
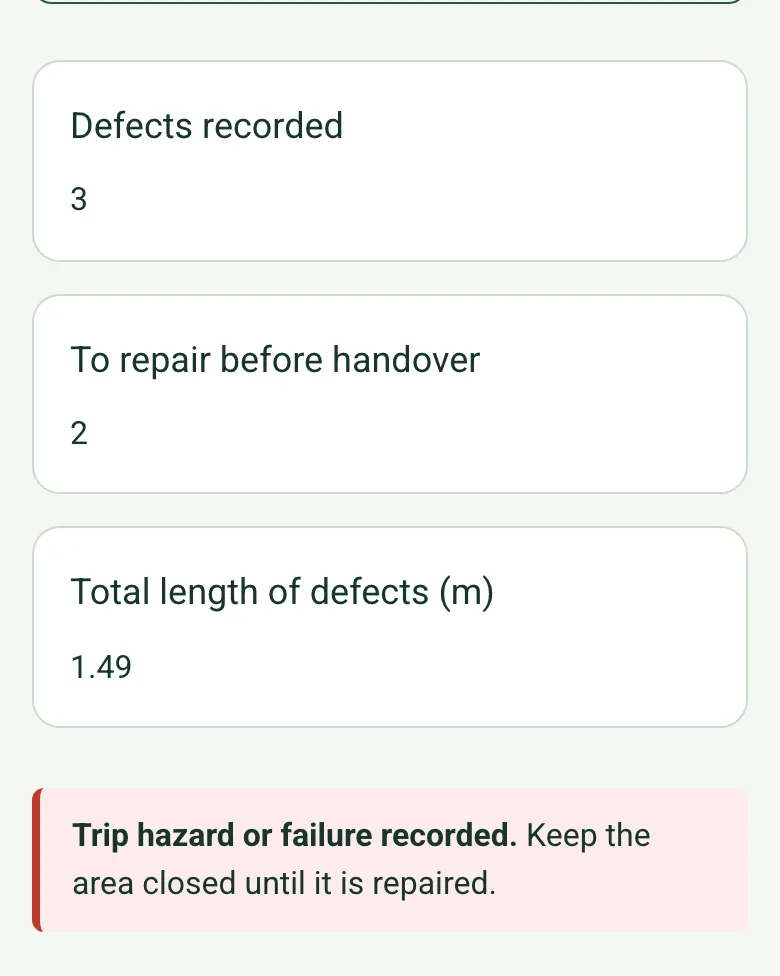
Defects recorded 3, to repair before handover 2 and total length of defects 1.49 m

What is left before handover

The form counts the defects, those to repair before handover and their total length, with a red note for a trip hazard, and counts the actions still open.

How calculated fields work →

The floor on video

Film the floor as you walk it. The clip is kept with the record, so the installer sees exactly what needs putting right.

How Walk Cam works →

A completed flooring inspection

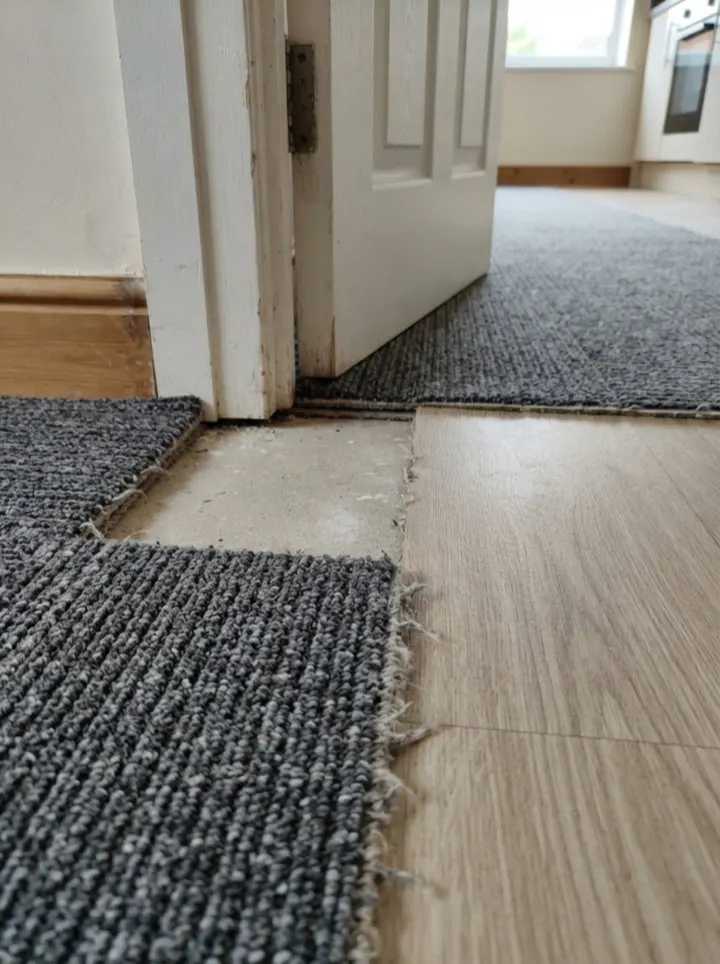
A fictional office fit-out: sheet vinyl over a screed that read 71% RH against a 75% RH limit, a lifting seam measured at 0.59 m that closed the corridor until it was rewelded, a missing threshold strip and an adhesive smear. Open it as a filled-in form, or switch to a blank copy and try it yourself.

A split, lifting seam in grey sheet vinyl measured from a photo at about 0.59 m long using an A4 sheet on the floor
Corridor seam · 0.59 m lifting · trip hazard, rewelded
A hygrometer hood taped to a bare screed floor with its display unit beside it
Screed 71% RH · limit 75% RH
A doorway where the threshold strip between carpet tiles and vinyl is missing
Tea point door · threshold strip missing

Try the flooring installation inspection form live

Answer a few questions and watch it adapt. Your answers are not saved, and any photos you add are deleted within the hour.

Live form: Flooring Installation InspectionOpen full screen ↗
Fill it in right here

This is the real form as your team would use it: questions appear as you answer, scores work themselves out and you can add photos and signatures. No sign-up needed. Or open a completed example to see every answer, photo and score filled in.

Want to see one filled in? See a completed flooring installation inspection report (PDF), made by SiteSurvey from a fictional site visit.

Walk Cam route · four guided clips

Record the flooring installation inspection on video

Make floor defects easy to locate. Film the room, then show an accessible seam, worn area and threshold with their surroundings.

Identify the property, room, floor type and visit date. Begin with a wide view, then move to accessible joins, wear and level transitions. Give each concern a precise location.

See the footage in a report

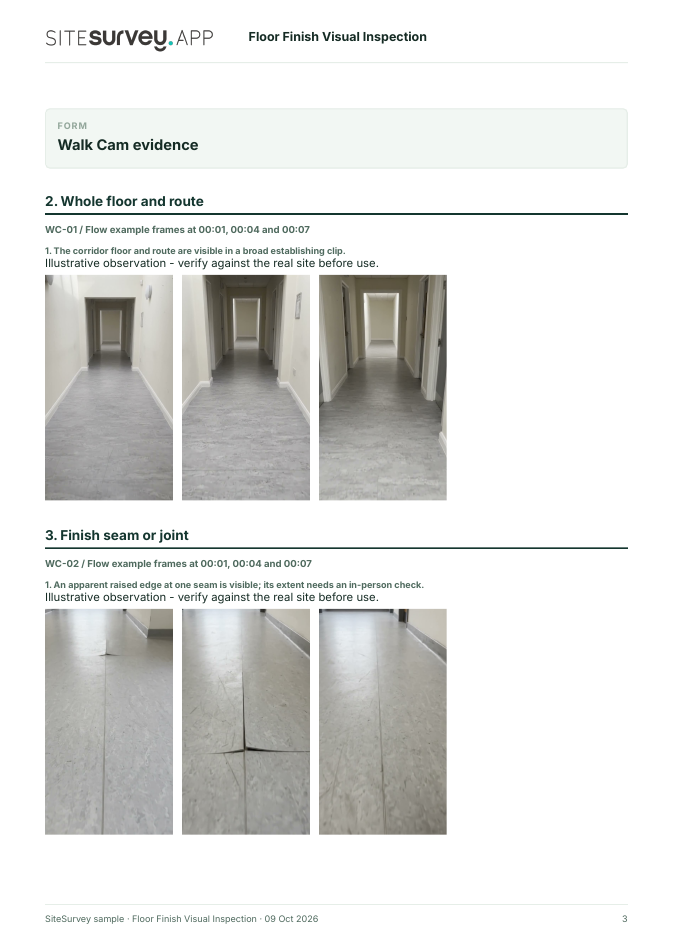
A fictional six-page example with the four points, twelve stills from the clips, observations, follow-up actions and the limits of a visual record.

View the visual evidence (PDF) ↗ · Download the full sample report

Visual evidence page from the floor finish visual inspection sample report, with footage stills and observations

This is a visual record of accessible floor finish only. Video does not measure slip resistance, prove substrate condition, identify a cause or establish that a route is safe to use. Example footage was generated in Google Flow and the observations are scripted; no real site is shown. Walk Cam works inside any form in the app. How Walk Cam works · All visual inspections

Fill it in on a phone or tablet

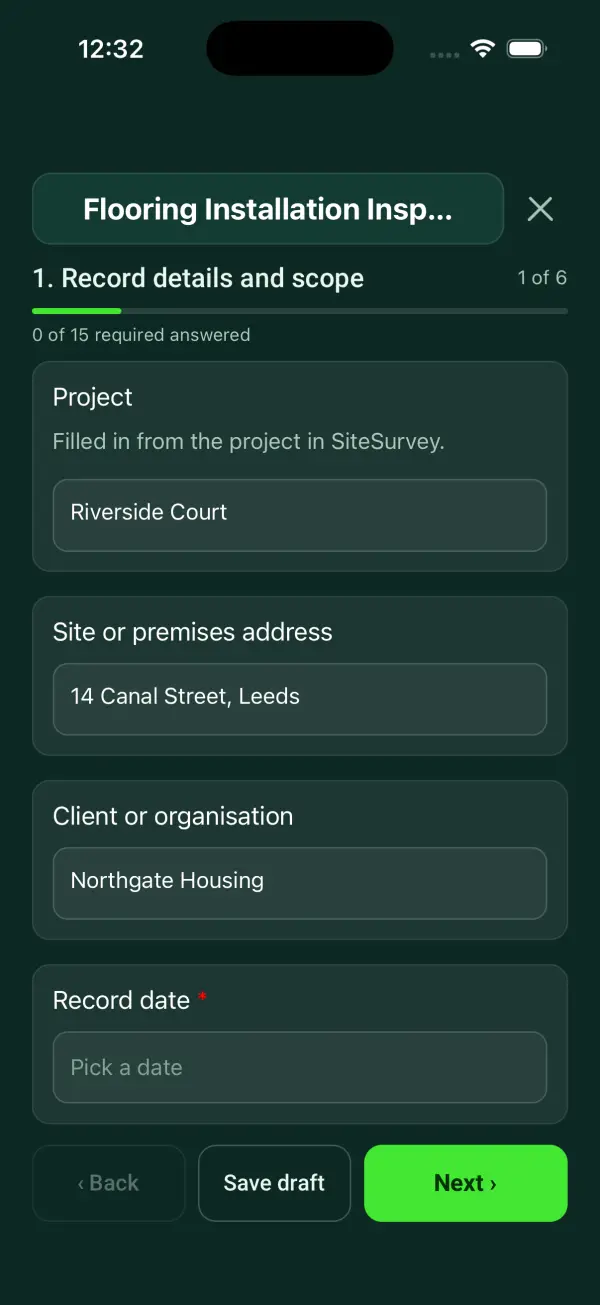
Your team completes the flooring installation inspection on site in the SiteSurvey app on iPhone, iPad and Android phones and tablets. The project name and address fill in for them, it works without signal, and it syncs when the device is back online with photos kept against the question they answer.

Customers and subcontractors do not need the app: send them a link and they can fill it in from any browser.

The Flooring Installation Inspection form in the SiteSurvey app on a tablet
The Flooring Installation Inspection form in the SiteSurvey app on a phone

Every question in the flooring installation inspection template

A flooring installation record covering the specified system, substrate evidence, product batches, installation observations, defects and handover limits. 6 sections and 64 questions. Follow-up questions and guidance appear only when an answer calls for them, so the person on site never sees the ones that do not apply.

Make it your own: every question is editable

This is a starting point, not a fixed form. Once it is in your SiteSurvey account you can reword any question, add or remove questions, sections and answer options, and add your own logo, so it fits the way your team works and the jobs you do.

Details you only enter once

Add this form to a project in SiteSurvey and it fills in what the project already knows, so nobody on site retypes it and every form on the job uses the same names. Anything filled in can still be changed.

  • Project: the project name
  • Site or premises address: the site address, from the space or the project
  • Client or organisation: the project's customer

Record details and scope

  • ProjectShort answer

    Filled in from the project in SiteSurvey.

    Fills in from the project name
  • Site or premises addressShort answer
    Fills in from the site address, from the space or the project
  • Client or organisationShort answer
    Fills in from the project's customer
  • Record date*Date
  • Person completing the record*Short answer
  • CheckThis records installation quality against supplied criteria. It is not a structural assessment, universal moisture-test method, slip-resistance certificate or asbestos survey.
  • CheckCodes of practice: BS 8203:2017 (installation of resilient floor coverings), BS 5325:2021 (installation of textile floor coverings), BS 8201:2011 (installation of flooring of wood and wood-based panels) and BS 8204-1 (concrete bases and cement-based levelling screeds). Acceptance also needs the project specification and manufacturer instructions; a checklist does not establish building control approval.

Flooring system

  • Room, floor and area reference*Short answer
  • Finish, substrate and system specification*Short answer
  • Room length (m)Number

    With a tape or laser measure.

  • Room width (m)Number
  • Floor area (m²)Worked out by the form
    Shown only when the answers above make it relevant
  • Product batches and instruction revision*Short answer
  • Installer and inspection stageShort answer

Substrate and environment

  • Substrate moisture method, instrument and report referenceShort answer
  • Actual results and approved acceptance criteriaShort answer

    Record the test method, location, units and system-specific criterion. Avoid applying a result to areas that were not tested.

  • Substrate relative humidity (% RH)Number

    From a hygrometer test, the highest reading. Type the method and report in the box above.

  • Limit from the specification or product instructions (% RH)Number
  • Moisture against the limitWorked out by the form
    Shown only when the answers above make it relevant
  • WarningAbove the limit. Do not lay the floor until it is within the limit, or a moisture control system the product allows has been applied. Record what was agreed.
    Shown only when the answers above make it relevant
  • Largest gap under a 2 m straightedge (mm)Number

    Measured with a gauge or wedge, not from a photo.

  • Allowed gap from the specification (mm)Number
  • Flatness against the specificationWorked out by the form
    Shown only when the answers above make it relevant
  • Preparation, repairs and compatibility evidence*Notes
  • Ambient and substrate conditionsShort answer

Installation checks

  • Layout and joints checked against design*Choose one
    • Acceptable
    • Action needed
    • Not checked
    • Not applicable
  • Action, limitation or reason not applicable*Notes
    Shown only when the answers above make it relevant
  • Adhesive or fixing records checked*Choose one
    • Acceptable
    • Action needed
    • Not checked
    • Not applicable
  • Action, limitation or reason not applicable*Notes
    Shown only when the answers above make it relevant
  • Levels, transitions and thresholds checked*Choose one
    • Acceptable
    • Action needed
    • Not checked
    • Not applicable
  • Action, limitation or reason not applicable*Notes
    Shown only when the answers above make it relevant
  • Surface defects and contamination recorded*Choose one
    • Acceptable
    • Action needed
    • Not checked
    • Not applicable
  • Action, limitation or reason not applicable*Notes
    Shown only when the answers above make it relevant
  • Protection and cure or access restrictions recorded*Choose one
    • Acceptable
    • Action needed
    • Not checked
    • Not applicable
  • Action, limitation or reason not applicable*Notes
    Shown only when the answers above make it relevant
  • Checks acceptableWorked out by the form
  • Checks needing actionWorked out by the form
  • Not checkedWorked out by the form
  • Installation evidencePhotos
  • Defects found
    Repeat for each defect. Each one asks:
    • Where is it?Short answer
    • Type of defectChoose one
      • Lifting or open seam
      • Bubbling or blistering
      • Indentation or damage
      • Gap at a wall or threshold
      • Uneven or hollow
      • Staining or contamination
      • Pattern or colour mismatch
      • other
    • Length of the defect (m)Number

      Lay an A4 sheet flat on the floor beside it and measure from a photo taken from above. An estimate.

    • SeverityChoose one
      • Cosmetic
      • Repair before handover
      • Trip hazard or failure
    • PhotosPhotos
    • Repair neededShort answer
  • Defects recordedWorked out by the form
  • To repair before handoverWorked out by the form
  • Total length of defects (m)Worked out by the form
  • WarningTrip hazard or failure recorded. Keep the area closed until it is repaired.
    Shown only when the answers above make it relevant
  • Walk Cam: floor finish visual inspectionWalk Cam video with voice-to-text

    Optional. Film the four guided points on the SiteSurvey app; each clip keeps its spoken note.

Handover

  • Repair and reinspection notesNotes
  • Cleaning and maintenance instructions handed overShort answer
  • Authorised release and restrictionsShort answer
  • Client or main contractor nameShort answer

    Person accepting the floor at handover.

  • Client or main contractor signatureSignature

Actions and review

  • Are further actions required?*Choose one
    • Yes
    • No
  • Further action
    Repeat for each further action. Each one asks:
    Shown when “Are further actions required?” is “Yes”
    • Action and evidence reference*Notes
    • PriorityChoose one
      • Urgent
      • High
      • Medium
      • Low
    • Person responsible*Short answer
    • Target dateDate
    • Action status*Choose one
      • Open
      • In progress
      • Completed
    • Completion evidenceNotes
      Shown when “Action status” is “Completed”
  • Actions still openWorked out by the form
    Shown when “Are further actions required?” is “Yes”
  • Outstanding limitations and information to pass onNotes
  • Record status*Choose one
    • Ready for review
    • Further work needed
    • Work or use stopped
  • Reviewed byShort answer
  • Review dateDate
  • Author signature*Signature
  • CheckSigning records the information entered. It does not itself certify legal compliance, remove a limitation or authorise unsafe work.

Scope and responsibility

This records installation quality against supplied criteria. It is not a structural assessment, universal moisture-test method, slip-resistance certificate or asbestos survey.

What a useful entry looks like

Actual results and approved acceptance criteria

Record the test method, location, units and system-specific criterion. Avoid applying a result to areas that were not tested.

Substrate result linked to test location F-06, instrument and method. Comparison uses the specified flooring system's documented criterion.

Fictional example of record wording. Use the actual evidence and approved arrangements for your job; this is not a completed report or an instruction to carry out the work.

See it filled in

A completed flooring installation inspection report, made by SiteSurvey from a fictional site visit: every answer, the photos, the guidance that applied and the sign-off, ready to send as a PDF.

See completed form (PDF) ↗

Flooring Installation Inspection FAQs

How should I record “Actual results and approved acceptance criteria”?

Record the test method, location, units and system-specific criterion. Avoid applying a result to areas that were not tested.

Does one moisture limit suit every floor?

No. Record the method and criterion for the specified substrate and flooring system.

Does a smooth finish prove slip resistance?

No. Reference the required product or testing evidence separately.

What if an existing layer may contain asbestos?

Record the concern and stop disturbance pending the appropriate assessment; this is not an asbestos survey.

What are the limits of this template?

This records installation quality against supplied criteria. It is not a structural assessment, universal moisture-test method, slip-resistance certificate or asbestos survey.

Can I complete this form on site and share the record?

In the SiteSurvey app the form works offline, with photos and signatures recorded against the questions. Share the completed record as a PDF or a link. Dates and action owners are recorded fields; this form does not send reminders or update other systems.

Related

Use this flooring installation inspection form with your team

Add it from the form library in one click, change any question, and every completed form becomes a branded PDF report.

Start your trial →