- 01
Open the report builder
Open the project and select the Report tab. The right-hand rail lists the project's forms, spaces and, under Walk Cam, every walk.
- 02
Insert the walk
Search the Walk Cam list if the project has many walks, select the arrow on the walk you want and choose Add all questions. The walk drops into the report as one Walk Cam block, with a point for each question. Use the minus and plus buttons on the block to set how many photos sit side by side.
- 03
Read what each point prints
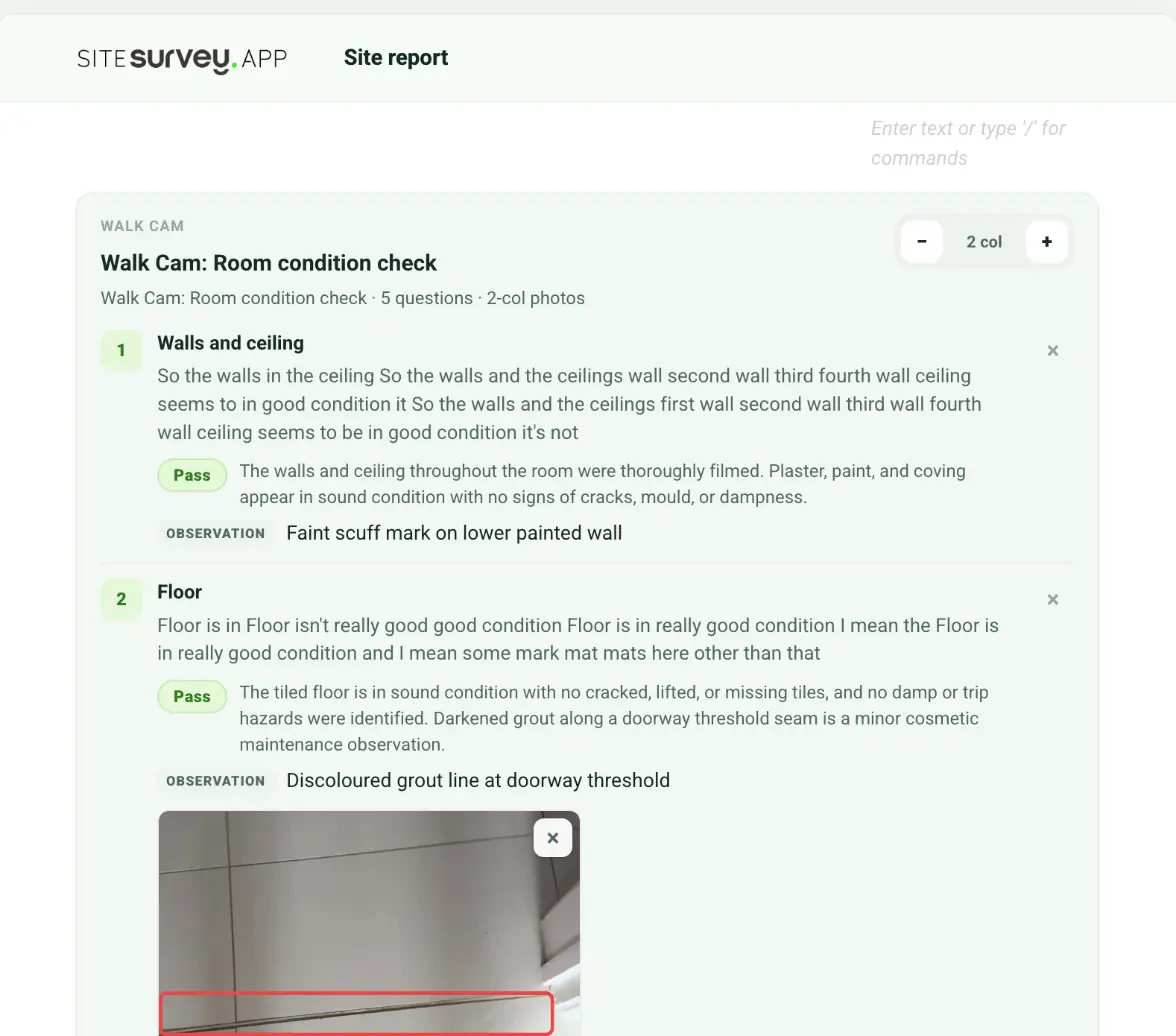
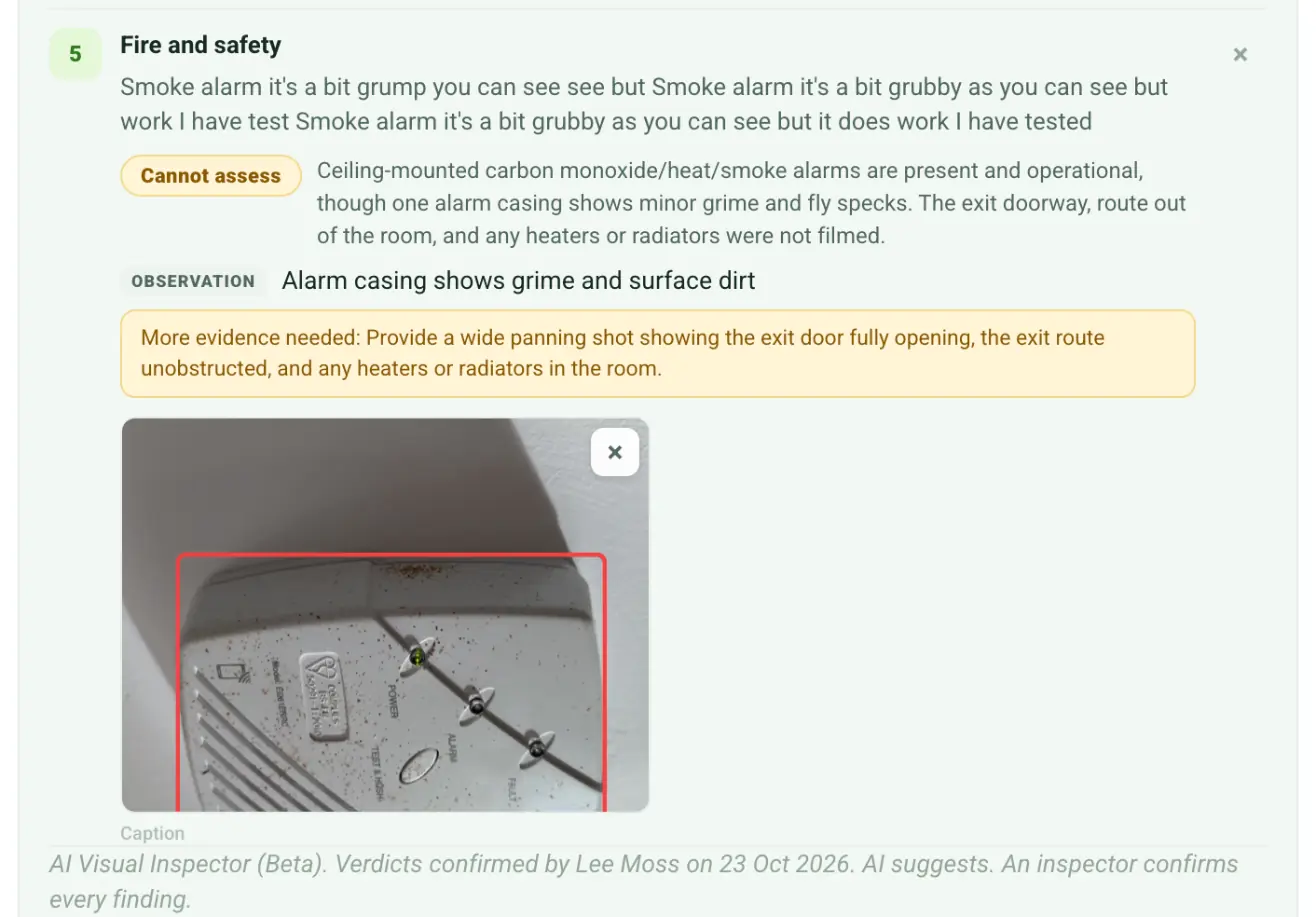
Each point shows its question, the inspector's spoken notes, the confirmed verdict chip (Pass, Fail, Check or Cannot assess) with the AI's summary next to it, the accepted findings with their severity, and the stills from the clip with each finding boxed in red. Remove a photo with its cross, or a whole point with the cross beside its title.
- 04
Check the footer line
Under the last point the block prints AI Visual Inspector (Beta). Verdicts confirmed by, then the inspector's name and the date, then AI suggests. An inspector confirms every finding. When more than one inspector confirmed points, all their names are listed. More evidence needed requests are printed with the point they belong to.
- 05
Export the report
Select PDF or Word under Export. Both carry the verdict chips, findings, stills and the footer line as they appear in the builder.
- 06
If a point prints Unconfirmed
The inspector has not confirmed that point yet, so the report shows only an Unconfirmed chip: no AI summary and no findings. Ask them to confirm it on the phone, then insert the walk again so the block picks up the confirmed verdict.
Good to know
- ✓Insert the walk after the inspector has confirmed every point, or insert it again afterwards: a block keeps what the walk held when it was added.
- ✓The AI's own suggestion is never printed on its own. Only the inspector's confirmed verdict reaches the report.
Was this guide helpful?
Your feedback helps us improve support content.