Spaces can represent anything from a meeting room to a plant area. Use names that field teams will recognise when they are standing on site.
- 01
Open the project
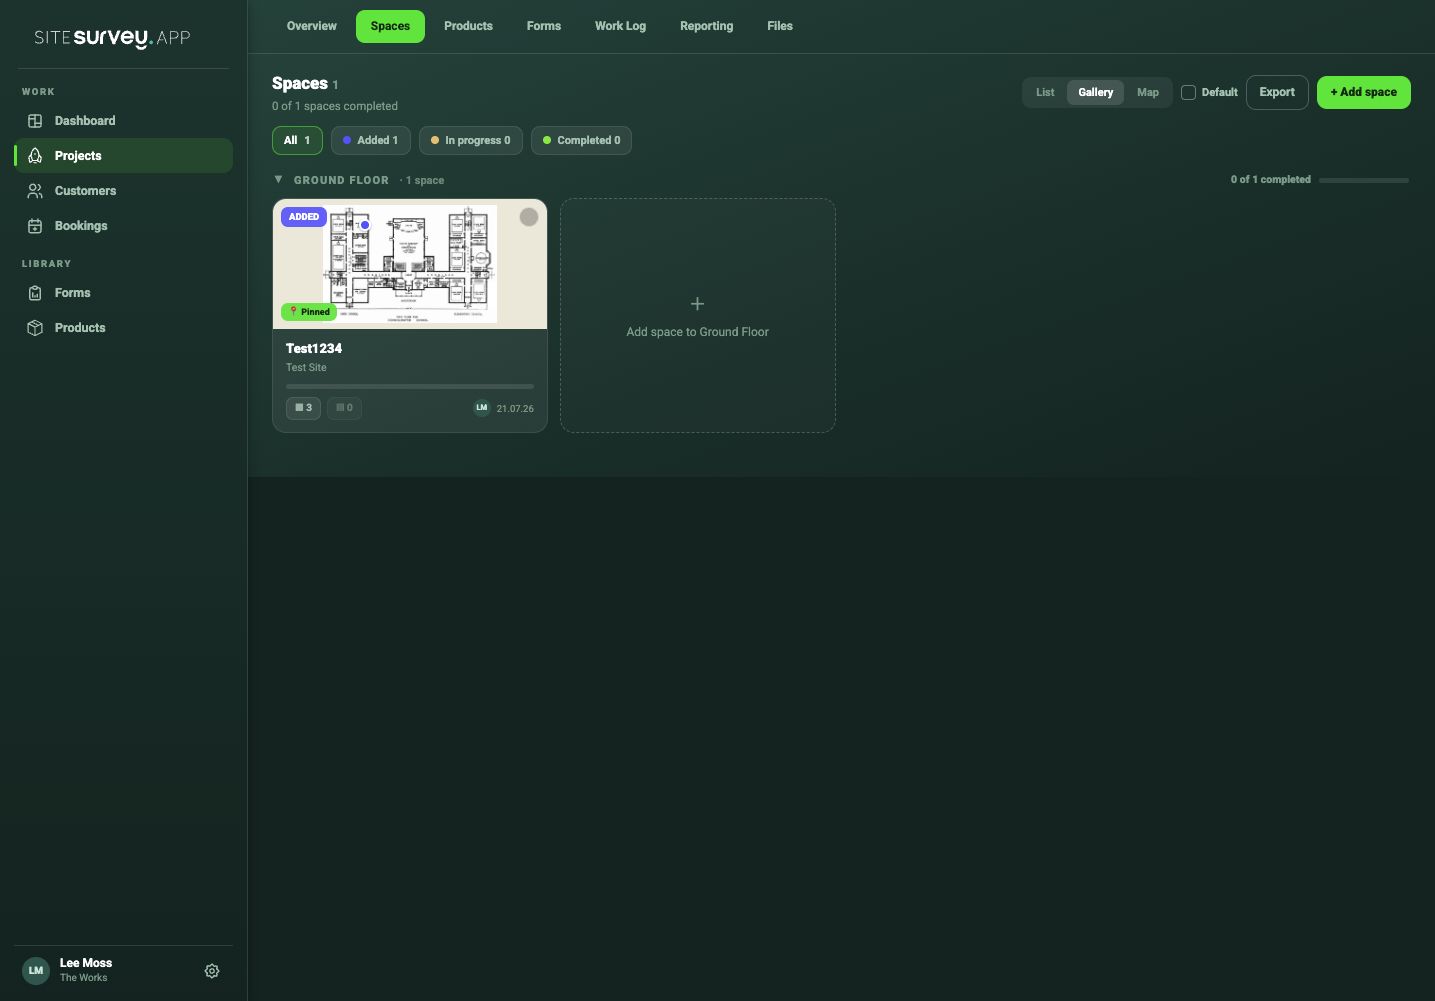
From Projects, choose the project you want to structure and open its Spaces area.
- 02
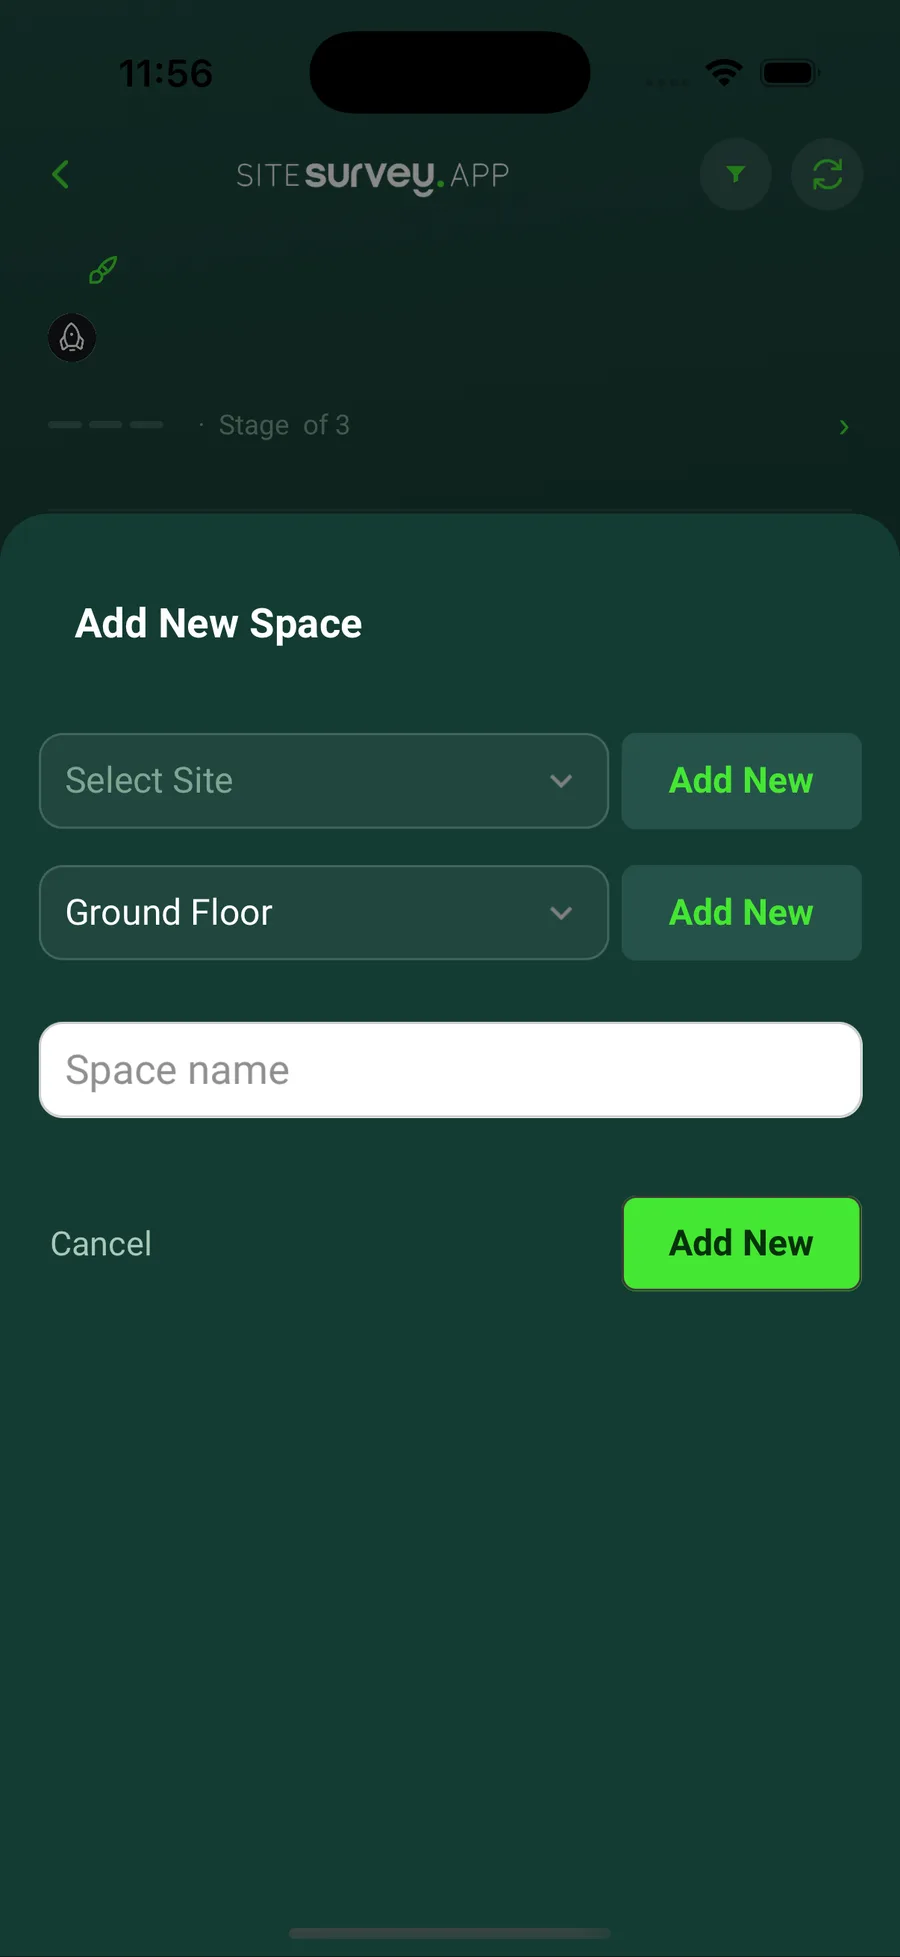
Select Add space
Create the room, zone, floor or external area that the team will visit.
- 03
Use a recognisable name
Match the name used on drawings, room signage or the customer’s schedule wherever possible.
- 04
Add relevant details
Include the reference or description needed to distinguish similar spaces.
- 05
Repeat for the site
Create the useful survey structure before assigning products and forms.
Good to know
- ✓Avoid creating one generic space called Site when the work covers multiple rooms.
- ✓Keep naming consistent across repeated sites so reports are easier to compare.
Was this guide helpful?
Your feedback helps us improve support content.