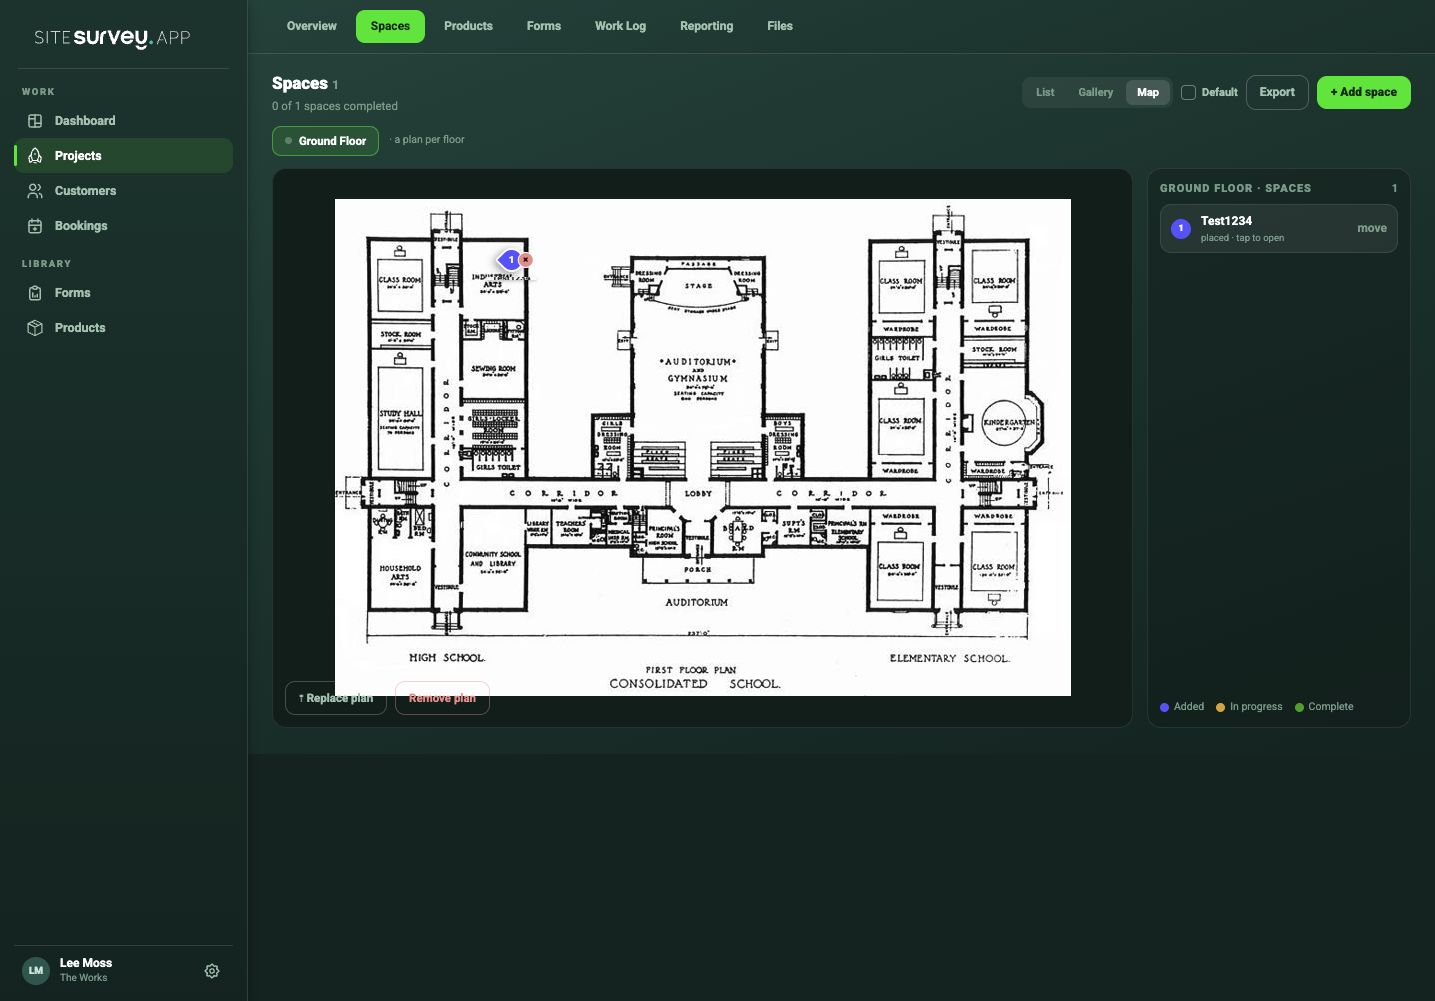
Floor-plan mapping turns a list of spaces into a visual site record. Each marker opens the space and the information captured there.
- 01
Open the project’s space view
Choose the project and open Spaces or the floor-plan view.
- 02
Add the plan
Upload the current floor plan or site plan for the level you are surveying.
- 03
Choose a space
Select an existing project space or create the space before positioning it.
- 04
Place the marker
Position the space marker over the matching room or zone on the drawing.
- 05
Review the complete map
Check that names and markers are readable and that each marker opens the correct space record.
Good to know
- ✓Use the latest drawing revision available.
- ✓Create a separate plan for each floor when one image would become too crowded.
Was this guide helpful?
Your feedback helps us improve support content.