- 01
Open Project settings
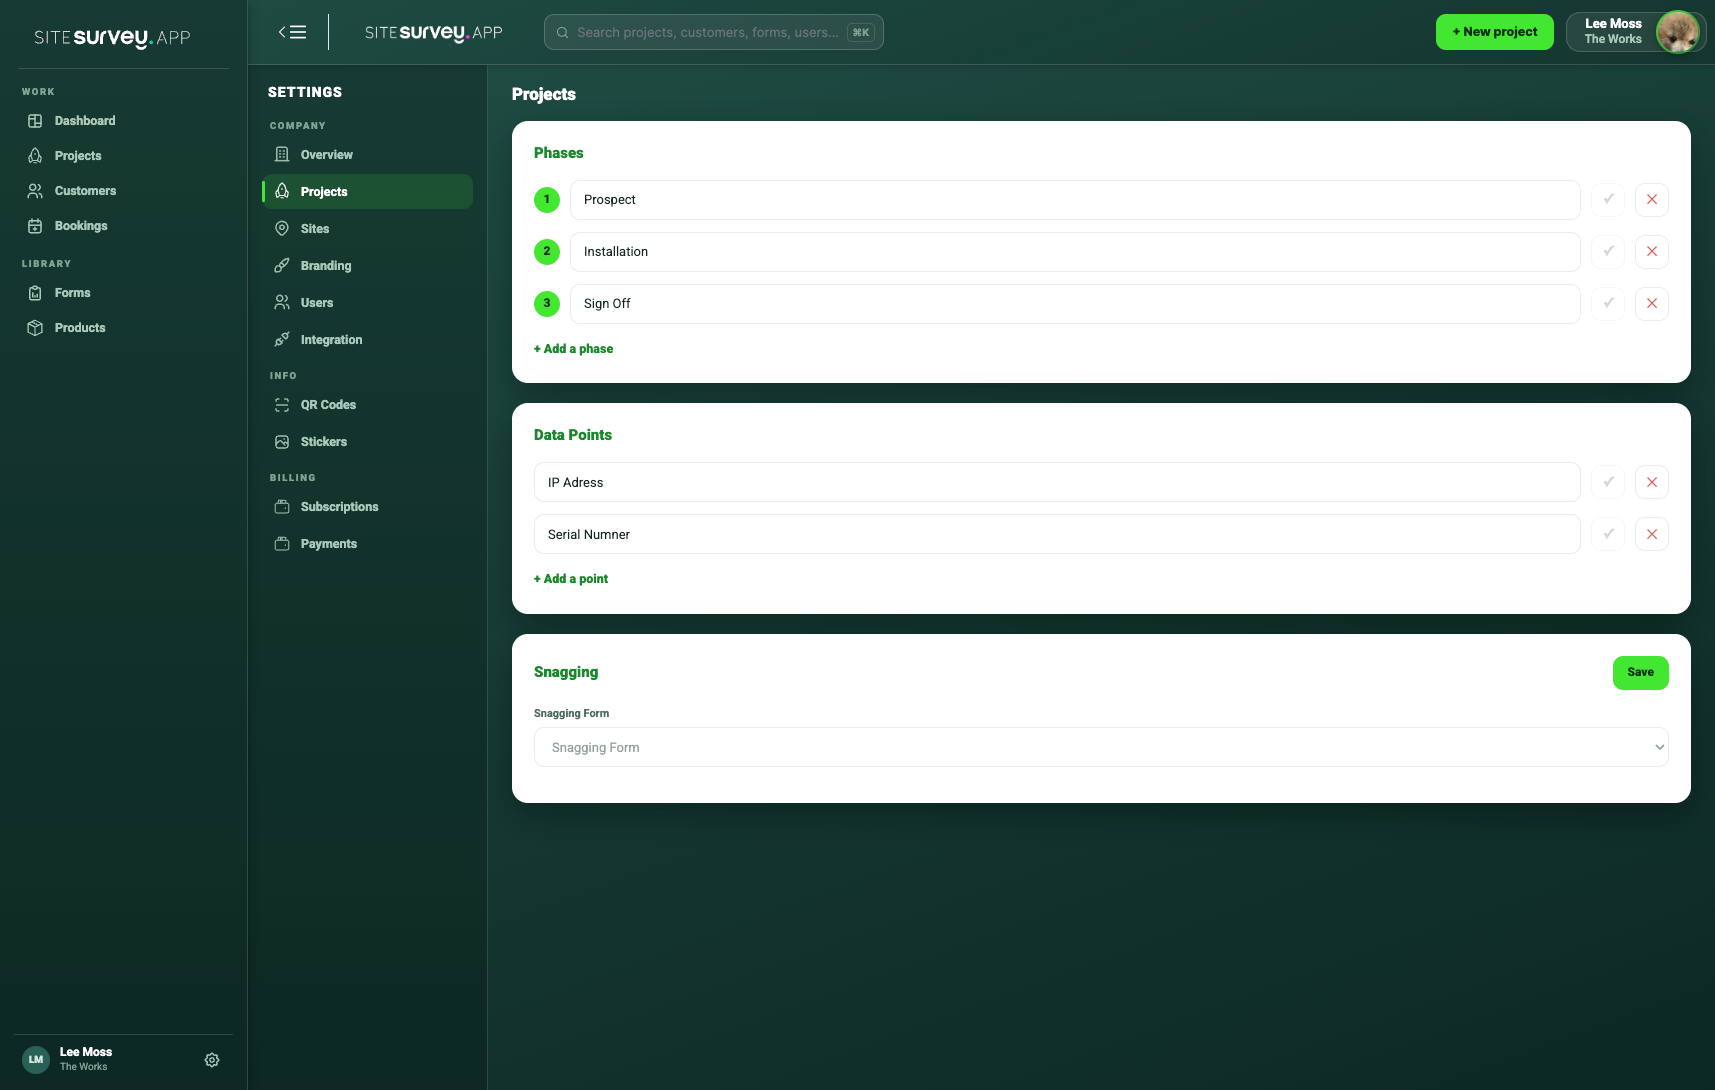
Open Settings and choose Projects under Company. The Phases panel shows the stages currently available across the workspace.
- 02
Review the current sequence
The numbered list shows the order used for project progress. A new workspace may begin with Prospect, Installation and Sign Off.
- 03
Add a phase
Select Add a phase, enter a clear stage name and confirm the new entry. Add phases in the sequence your team expects to follow.
- 04
Save the settings
Save or confirm the change, then check that the phase remains visible after the page reloads.
- 05
Check a project
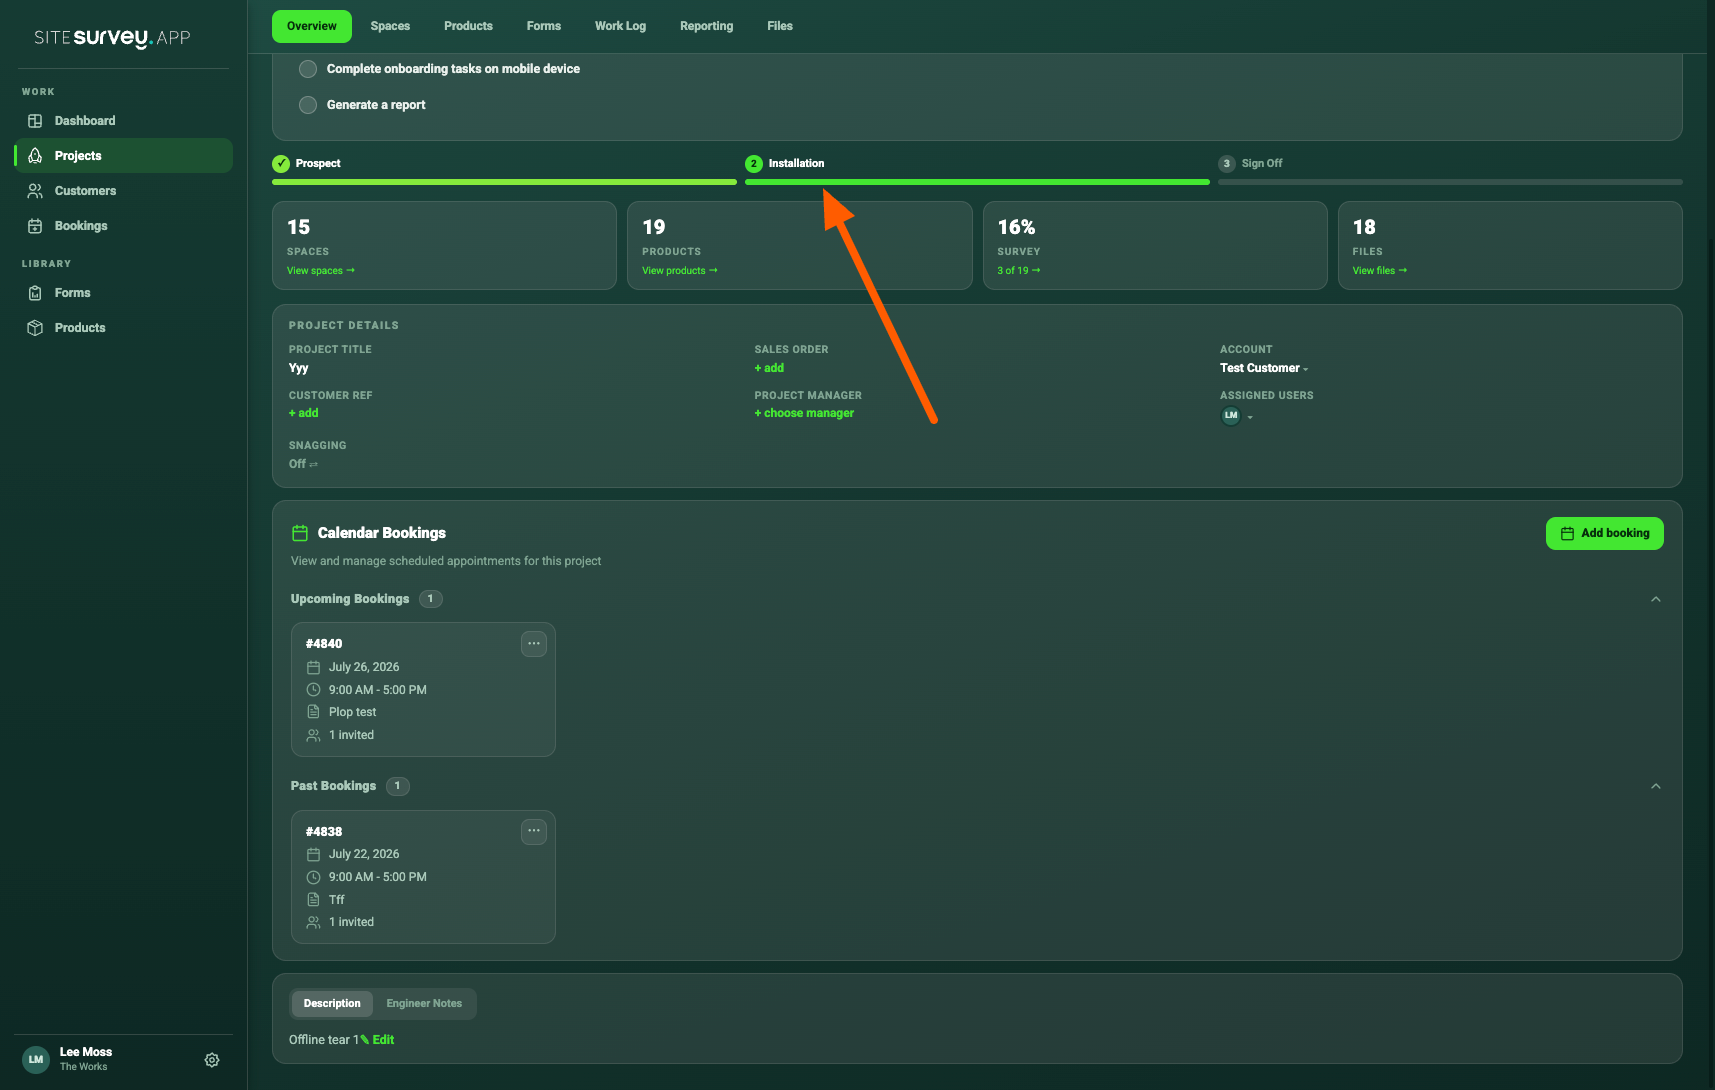
Open a project overview and review the progress bar. The project’s current phase is shown against the ordered workspace stages.
- 06
Review before removing a phase
Before deleting or renaming a phase, check which live projects use it and agree how those projects should be classified.
Good to know
- ✓Use short phase names that everyone understands.
- ✓Only add stages that help the team understand project progress.
- ✓Project phases track status; they do not create automated tasks, triggers or dependencies.
Was this guide helpful?
Your feedback helps us improve support content.